


Learning how to arc weld starts with proper preparation, the right equipment, and good control of the welding arc. Arc welding uses an electric arc to generate heat, melt the base metal, and create a strong joint. For beginners, the basic process involves preparing the metal, setting up the welder, choosing the right electrode, striking the arc, controlling the arc length, laying the weld bead, and inspecting the finished weld.
Arc welding is widely used for construction, repairs, fabrication, and DIY projects because it can be performed on a variety of metals and does not always require complex equipment. In this guide, we’ll break down how to arc weld step-by-step to help you get started!
What is Arc Welding?
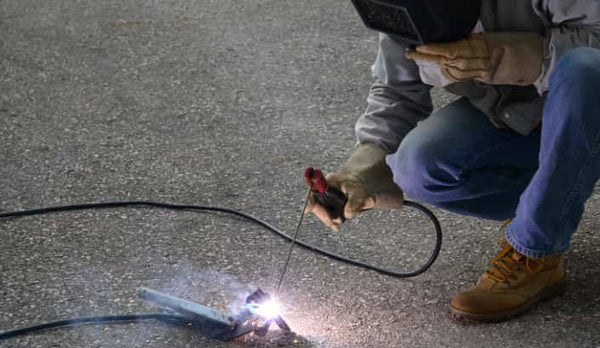
Arc welding is a type of welding that uses electricity to create a high-temperature arc to melt metal and join two pieces of metal together. It is a versatile and widely used welding process that can be used to weld a variety of metals, including steel, stainless steel, aluminum, and copper.
Arc Welding Process
Arc welding is a broad category that includes several processes. Stick welding, also called Shielded Metal Arc Welding (SMAW), uses a flux-coated consumable electrode. MIG welding uses a continuously fed wire electrode, while TIG welding uses a non-consumable tungsten electrode. The best process depends on the material, thickness, joint design, and application.
Arc welding differs from other types of welding in that it uses an electric arc to generate heat, whereas other types of welding, such as gas welding, use a flame to generate heat.
Additionally, arc welding can be performed using a variety of welding techniques, including stick welding, MIG welding, and TIG welding.
Arc Welding Advantages
One of the advantages of arc welding is its versatility. It can be used to weld a variety of metals and can be performed in a variety of settings, including in the field or in a workshop.
Additionally, arc welding is a relatively simple process that can be learned quickly with the right training and equipment.
For beginners, stick welding is particularly useful for learning basic arc control because the equipment is relatively simple and can be used for many repair and fabrication applications.
Safety Precautions for Arc Welding
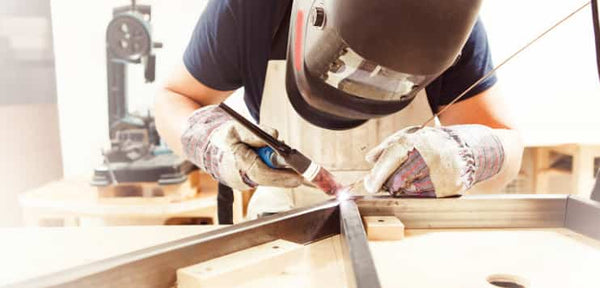
When it comes to arc welding, safety should always be your top priority. Before you begin welding, make sure you have taken the necessary safety precautions to protect yourself and those around you.
Here are some essential safety measures to take before beginning to arc weld:
1. Personal Protective Equipment
Welding produces intense heat and bright light, which can cause serious injuries if proper personal protective equipment (PPE) is not worn. Here are some PPE you should consider:
- Welding helmet with a cover plate
- Safety glasses or goggles
- Flame-resistant clothing
- Welding gloves
- Leather boots
- Earplugs or earmuffs
- Respirator for protection from toxic fumes
2. Workspace Setup
Your workspace should be set up in a way that minimizes the risk of accidents. Here are some workspace safety precautions:
- Keep your workspace clean and free of clutter
- Remove all flammable materials from the area
- Make sure your welding machine is in good condition and properly grounded
- Keep a fire extinguisher nearby
- Ensure proper ventilation to avoid inhaling harmful fumes and gases
4 Basic Equipment Needed for Arc Welding
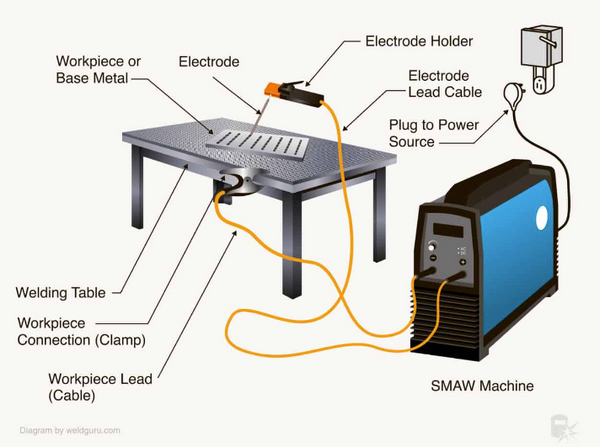
Arc welding is a process that requires specific equipment to create a strong and reliable weld.
Here is a list of the essential equipment you need to get started with arc welding:
1. Welding Machine
The welding machine is the most critical piece of equipment for arc welding. It provides the electrical current necessary to create an arc between the electrode and the metal being welded.
There are different types of welding machines available, such as AC, DC, and AC/DC. The type of welding machine you choose will depend on the type of metal you are welding and the thickness of the material.
2. Electrodes
Electrodes are the filler material used to create the weld. They are made of different materials, such as steel, aluminum, and nickel alloys. The type of electrode you choose will depend on the type of metal you are welding and the welding technique you are using. Electrodes come in various sizes and shapes, and you must choose the right one for the job.
Learn more about Different Type of Welding Rods in this detailed guide.
3. Clamps
Clamps are used to hold the metal being welded in place. They come in different sizes and shapes and are designed to hold the metal securely to prevent movement during the welding process. Clamps are essential for creating a clean and precise weld.
4. Protective Gear
Protective gear is crucial for arc welding. The intense heat and bright light produced during the welding process can cause severe burns and eye damage. Therefore, it is essential to wear protective gear such as welding helmets, gloves, and safety glasses.
Welding helmets protect your face and eyes from the bright light produced during the welding process. Welding gloves protect your hands from burns, while safety glasses protect your eyes from flying debris and sparks.
Preparing to Arc Weld
Before you start arc welding, it is essential to prepare both the material and equipment to ensure a successful welding process.
1. Material Preparation
The first step in preparing for arc welding is to clean the metal surface to remove any dirt, grease, or rust. This can be done using a wire brush or grinder. Cleaning the metal ensures that the welding process is not impeded by any contaminants that may weaken the weld.
If the metal consists of two pieces that are to be joined in the welding process, you may need to prep, or weld prep them, by grinding a beveled edge on the sides that are to be joined. This allows for sufficient penetration of the weld arc to melt both sides to a molten state so the filler metal bonds through the sectional thickness of the metal.
2. Equipment Preparation
Once the material is prepared, set up the welding machine according to the electrode manufacturer's recommendations.
Choose the correct electrode for the base metal and material thickness, then set the welding current within the recommended range for that electrode. The required amperage depends on factors such as electrode diameter, electrode type, material thickness, joint design, and welding position, so there is no single amperage setting that works for every arc-welding job.
For stick welding, make sure the electrode is clean and dry before use. Connect the electrode holder and work clamp securely, check the polarity recommended for the electrode, and make sure the workpiece has a reliable electrical connection.
How to Arc Weld: Step-by-Step Guide
If you're learning how to arc weld for beginners, the basic procedure is straightforward: prepare the workpiece, set up the welder, strike the arc, maintain a consistent arc length, control travel speed, and inspect the finished weld.
Step 1: Prepare Your Work Area
Before welding, make sure the workspace is clean, dry, well-ventilated, and free of flammable materials. Put on your welding helmet, gloves, flame-resistant clothing, and other required PPE.
Step 2: Prepare the Metal
Clean the metal to remove rust, oil, paint, and other contaminants. If you're joining two pieces, position and clamp them securely to maintain the correct alignment and joint gap.
Step 3: Set Up the Welding Machine
Choose the appropriate electrode for the material and joint. Set the welding machine to the recommended amperage based on the electrode size and material thickness. Make sure the ground clamp has a clean connection to the workpiece.
Step 4: Strike the Arc
Hold the electrode slightly above the workpiece and strike it against the metal with a quick motion, similar to striking a match. Once the arc starts, lift the electrode slightly to maintain a consistent arc length.
Step 5: Create the Weld Bead
Move the electrode steadily along the joint while maintaining a consistent arc length and travel speed. Use a suitable motion, such as a slight weave or controlled side-to-side movement, depending on the joint and material.
Step 6: Control the Heat
Monitor the weld pool as you work. Adjust your travel speed or amperage when necessary to prevent excessive heat, burn-through, undercut, or poor penetration.
Step 7: Finish and Inspect the Weld
When the weld is complete, allow it to cool before removing clamps. Remove slag with a chipping hammer and wire brush, then inspect the weld for cracks, porosity, undercut, or incomplete fusion.
Arc Welding Settings: How Many Amps Do You Need?
There is no single amperage setting for arc welding. The correct current depends mainly on the electrode type and diameter, material thickness, welding position, and joint design. Always start with the electrode manufacturer's recommended amperage range and adjust based on the weld pool and bead appearance.
| Electrode Diameter | Typical Amperage Range* |
|---|---|
| 1/16 in. | 20–40 A |
| 3/32 in. | 40–90 A |
| 1/8 in. | 75–130 A |
| 5/32 in. | 105–180 A |
*These are general reference ranges, not universal settings. Always follow the electrode manufacturer's specifications and adjust for the specific material and welding position.
Common Arc Welding Techniques
There are several common arc welding techniques that you can use depending on the type of weld you need to make and the materials you are working with. Here are some of the most popular techniques:
1. Whip and Pause Technique
The whip and pause technique is a popular technique used for welding thin metals. This technique involves moving the electrode in a whipping motion while pausing at the end of each whip. The whip and pause technique is ideal for creating a strong weld without burning through the metal.
2. Circle Technique
The circle technique is a common technique used for welding thicker metals. This technique involves moving the electrode in a circular motion around the weld joint. The circle technique is ideal for creating a wider weld bead and for welding thicker materials.
3. Weaving Technique
The weaving technique is a popular technique used for welding wider joints. This technique involves moving the electrode in a weaving motion while maintaining a consistent arc length. The weaving technique is ideal for creating a wider weld bead and for welding wider joints.
4. Tack Welding
Tack welding is a technique used to hold two pieces of metal together temporarily before making a final weld. This technique involves making small welds at various points along the joint to hold the pieces of metal in place.
5. Spot Welding
Spot welding is a technique used to join two pieces of metal together at specific points. This technique involves applying a high amount of heat to a specific point on the metal until it melts and fuses with the other piece of metal.
Common Arc Welding Problems and How to Solve Them
As an arc welder, you may encounter a few common problems while welding. Here are some of the most common issues and their solutions:
1. Electrode Sticking
One of the most common issues welders face is electrode sticking. This happens when the electrode gets stuck to the workpiece, making it difficult to remove.
To prevent electrode sticking, make sure you're using the correct amperage for the electrode and maintaining an appropriate arc length. A weak electrical connection, incorrect amperage, or improper arc-starting technique can also contribute to sticking.
If the electrode gets stuck, release the electrode holder and safely remove the electrode after the arc has stopped.
2. Spatter
Spatter is another common issue that occurs during arc welding. It happens when small droplets of molten metal are scattered around the weld area.
To reduce spatter, make sure you're using the correct electrode, amperage, arc length, and welding technique. Keep the welding area clean and free of debris.
3. Weld Cracks
Weld cracks can occur due to a variety of reasons, including incorrect welding technique, improper preparation of the workpiece, or unsuitable welding parameters.
To reduce the risk of weld cracking, properly prepare the workpiece, select a compatible electrode, follow the recommended welding parameters, and use an appropriate welding sequence for the joint.
How to Arc Weld for Beginners
For beginners, learning how to arc weld involves six basic steps:
- Clean and prepare the metal.
- Choose the correct electrode for the material and thickness.
- Set the welding current according to the electrode manufacturer's recommendation.
- Strike the arc and maintain a consistent arc length.
- Move steadily along the joint while controlling heat and travel speed.
- Remove slag and inspect the finished weld for visible defects.
The key to good arc welding is consistent arc length, appropriate amperage, controlled travel speed, and proper preparation. Beginners should practice on scrap metal before welding critical joints or structural components.
Conclusion
Learning how to arc weld is a valuable skill that opens up opportunities for DIY projects, repairs, and professional work.
By following the step-by-step guide, beginners can understand the basics of setting up equipment, preparing materials, and creating strong welds.
Practice is key, so start with simple projects to build your confidence and improve your technique. Remember to always wear the right safety gear and follow safety guidelines. Arc welding may seem challenging at first, but with patience and the right tools, anyone can master it. Now, get out there and start practicing your welding skills!
Ready to take the next step? Purchase your Arc Welder from ArcCaptain today and enjoy top-quality performance. If you need more assistance, please don't hesitate to contact us!
Frequently Asked Questions on How to Arc Weld
How to do arc welding for beginners?
If you are new to welding, arc welding is a great starting point. Shielded Metal Arc Welding (SMAW), also known as stick welding, is considered good for beginners. It requires less equipment and is more forgiving with regards to weld cleanliness. Its simplicity makes it a great starting point for those new to welding. Before you begin, make sure you have the right equipment, including a welding machine, electrode holder, ground clamp, and welding helmet.
How do you start an arc when stick welding?
Starting an arc when stick welding can be tricky, but it is essential to get a good weld. Follow these steps to start an arc:
- Clean the metal surface to be welded.
- Set your electrode to the correct amperage for the thickness of the metal you are welding.
- Hold the electrode holder at a 90-degree angle to the metal surface.
- Strike the electrode against the metal surface with a quick motion, then pull it back about 1/8 inch to establish an arc.
- Once the arc is established, you can begin welding.
What is the best arc welding method?
The best arc welding method depends on the project you are working on. There are several distinct methods, each tailored to specific applications and materials. Understanding these different arc welding techniques is essential for choosing the right approach to match your welding project's requirements. The primary types of arc welding are:
- Shielded Metal Arc Welding (SMAW)
- Gas Tungsten Arc Welding (GTAW)
- Gas Metal Arc Welding (GMAW)
- Flux-Cored Arc Welding (FCAW)
What is the strongest arc weld?
The strength of an arc weld depends on several factors, including the type of metal being welded, the welding method used, and the skill of the welder. However, in general, Gas Tungsten Arc Welding (GTAW) produces the strongest arc welds. GTAW, also known as TIG welding, uses a tungsten electrode to create an arc that melts the metal being welded. This creates a strong, precise weld that is ideal for critical applications such as aerospace and medical equipment.
Do you push or pull with arc welding?
With stick (SMAW) arc welding, you generally pull (drag) the electrode rather than push it. A slight drag angle helps control the arc and slag.
Why do welders drink milk after welding?
Some welders drink milk because they believe it helps with welding fumes, but milk does not neutralize or remove toxic fumes. Proper ventilation and respiratory protection are the correct safety measures.
Is arc welding harder than MIG?
For most beginners, arc (stick) welding is harder than MIG because it requires more control over arc length, electrode angle, and slag. MIG is generally easier to learn and maintain.


