
Brazing brass offers unique advantages over other metal joining techniques. It creates strong, leak-proof joints between brass components or dissimilar metals while avoiding damage from high heat.
This comprehensive guide will walk readers through the brazing process step-by-step, providing expert techniques to ensure success. From surface preparation to selecting the right filler metal, flux, and equipment, readers will gain the knowledge needed to braze brass with confidence.
Whether joining brass fittings, repairing damaged parts, or taking on large-scale brazing projects, this article covers everything needed to master this essential skill for working with brass.
With the help of clear instructions and visual aids, both hobbyists and professionals alike can implement these methods to braze brass successfully.
What Is Brazing Brass?
Brazing brass refers to the process of joining pieces of brass through the use of a filler metal that melts at a lower temperature than the base metals. The filler metal is melted and flows into the joint then cooled to form a strong bond.
Read related article: How to Weld Brass with TIG and MIG Welding?
Why Braze Brass?
Brazing brass is ideal for joining brass components that cannot be welded. The lower melting point of the brazing filler metals allows brass parts to be joined without melting the base metal. Brazed brass joints can be as strong as or stronger than the materials being joined. Brazing also creates a clean, attractive joint with little distortion.
Brazing Filler Metals for Brass
The most common brazing filler metals for brass are copper-zinc alloys that match the brass being joined. For joining brass alloys containing up to 30% zinc, a filler with a similar zinc content is typically used, such as a brass or copper-zinc brazing filler metal. For higher-zinc brasses, a lower-zinc or zinc-free filler may be needed to avoid zinc erosion. Silver brazing alloys can also be used to braze all brasses and provide stronger, higher-temperature joints.
Brazing Process
The basic brazing process involves cleaning and fluxing the joint, assembling the pieces, heating the assembly, and applying the brazing filler metal. The filler metal is distributed through capillary action and then allowed to cool and solidify. Proper preparation, atmosphere, temperature control, and cooling are key to achieving a strong, well-bonded brazed brass joint. With some practice, brazing brass can produce high-quality joints for many applications.
Supplies You'll Need to Braze Brass
To successfully braze brass, several essential supplies are required.
Safety Equipment
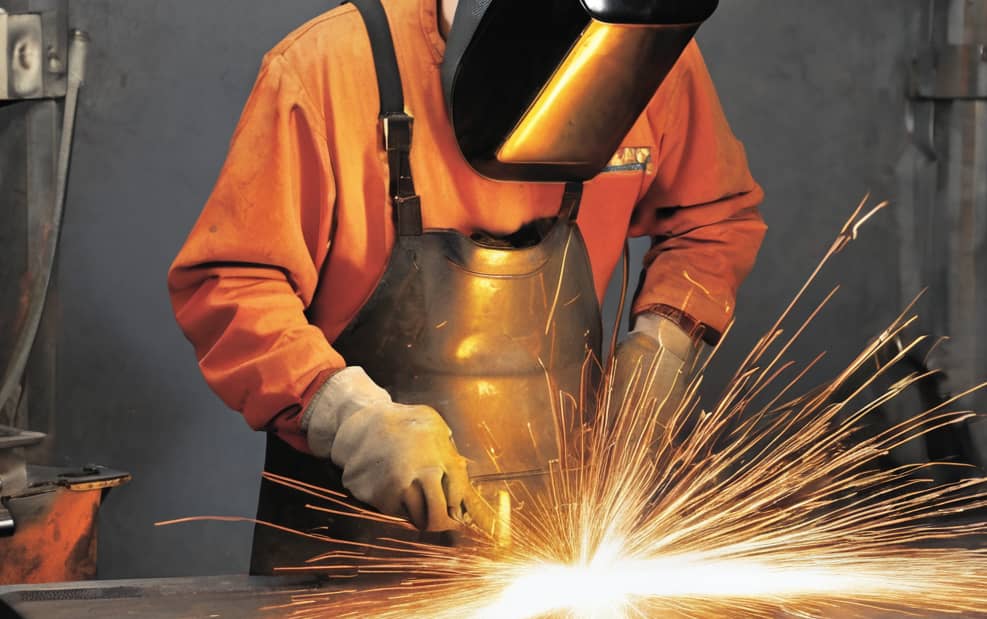
It is important to wear proper safety equipment when brazing, including fire-resistant gloves, protective eyewear, and adequate ventilation. Brazing can produce toxic fumes, so brazing should only be done in a well-ventilated area.
Brazing Rod
A brazing rod with a melting point lower than brass, such as silicon bronze or phosphor bronze, is necessary. The rod should contain flux to aid in heating and bonding. For brazing brass, brazing rods with a melting point between 900 to 1900°F are typically used.
Heat Source
A high-temperature heat source, such as an oxy-fuel torch or furnace, is required to reach brazing temperatures. Oxy-fuel torches using acetylene and oxygen are commonly used for brazing as they can reach the high temperatures required, around 1900°F for phosphor bronze brazing rods. Furnaces can also be used but require longer heating times.
Flux
Flux aids in heating the brass pieces, protecting them from oxidation, and allowing the brazing alloy to flow properly. Flux often comes pre-applied to brazing rods, but can also be purchased separately as a paste. The flux should have a high melting point to avoid prematurely burning away before the brazing temperature is reached.
Other Useful Tools
Other useful tools include a fireproof surface to work on, clamps or jigs to hold pieces in place, wire brushes to clean surfaces, and pliers. With the proper safety equipment and essential supplies in place, brass pieces can be successfully brazed to create a durable bond. However, brazing requires working with high heat, so caution must be exercised throughout the process.
How to Prepare Brass for Brazing
To prepare brass for brazing, it is important to properly clean and flux the metal. Cleaning the brass removes any dirt or oils from the surface so the brazing alloy can properly bond to the base metal. Fluxing the brass protects the metal from oxidation during the heating process.
Cleaning the Brass
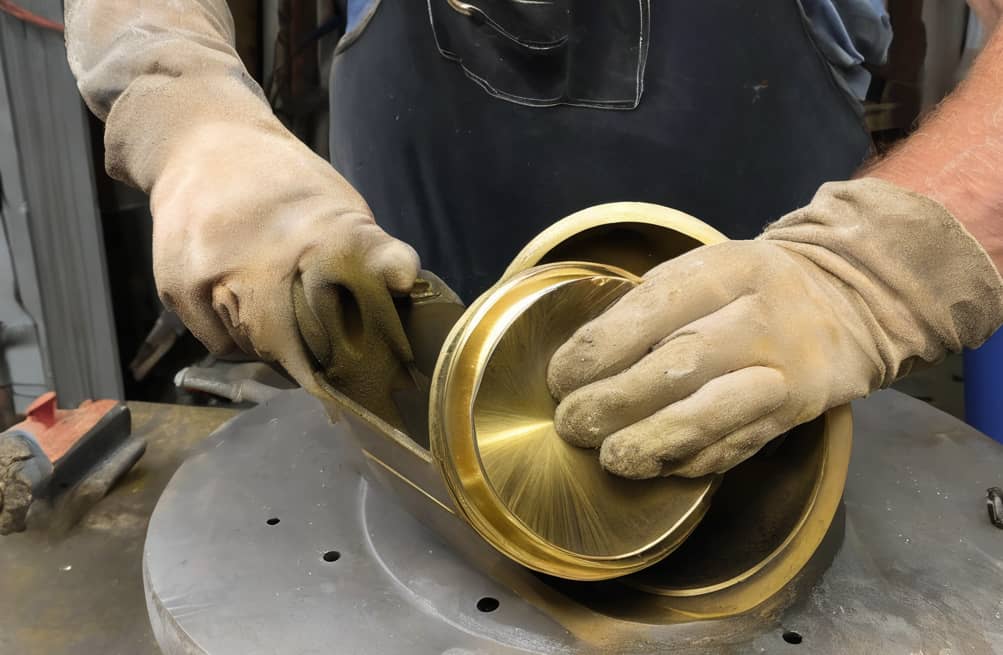
The brass pieces should be scrubbed with an abrasive pad and a solvent like acetone or lacquer thinner to remove any contaminants from the surface. For stuck-on debris, a commercial brass cleaner or fine-grit sandpaper can be used. The brass should then be rinsed with water and dried completely. Any remaining dirt or residue will prevent the brazing alloy from properly bonding to the brass.
Applying Flux
Flux is a chemical compound that prevents oxidation by forming a barrier between the air and the hot metal. As brass is heated during brazing, the flux will melt and continue to protect the surface of the brass from oxidation. For brazing brass, a borax- or boric acid-based flux is typically used. The flux should be brushed onto all surfaces of the brass that will be joined or exposed to heat during brazing. It is best to apply flux shortly before brazing as its effectiveness can decrease over time.
Heating the Brass
Once cleaned and fluxed, the brass pieces must be clamped together in the desired position and heated using a torch. As the brass is heated, the flux will melt and flow over the surface. The brass should be heated to the proper temperature according to the brazing alloy being used, typically between 1,100 to 2,000 degrees Fahrenheit. The brass will be ready for brazing when the flux becomes liquid and flows freely over the brass and the brazing alloy melts upon contact with the brass. At this point, the brazing alloy can be applied and will be drawn into the joint by capillary action.
Step-by-Step Process on How to Braze Brass
Step 1: Prepare the Brass for Welding
Before you start welding, ensure that the brass pieces are clean and free from dirt, oil, or oxidation. Use a wire brush or sandpaper to remove any surface contaminants. For heavily oxidized brass, use a chemical cleaner to remove the oxidation. Properly preparing the brass surface is crucial for achieving a strong weld.
Step 2: Set Up Your Welding Workspace
Choose a well-ventilated area for welding, as the process produces fumes that can be harmful if inhaled. Place a fire-resistant surface, such as a welding blanket or a sheet of metal, on your work table to protect it from heat and spills. Ensure that you have all the necessary welding equipment and safety gear ready.
Step 3: Select the Appropriate Filler Metal
Choose a filler metal that is compatible with brass for welding. Some popular options include:
- Silver-based alloys (e.g., BAg-1, BAg-2)
- Phosphorus-copper alloys (e.g., BCuP-2, BCuP-5)
- Nickel-silver alloys (e.g., RBCuZn-2)
Make sure the filler metal is in the form of a wire or rod, as this will make it easier to apply during the welding process.
Step 4: Apply Flux for Welding
Flux is a chemical compound that prevents oxidation and promotes the flow of the filler metal during welding. Apply a thin layer of flux to the joint area using a brush or a flux pen. Ensure that the flux covers the entire area where the filler metal will be applied.
Step 5: Heat the Joint for Welding
Using a welding torch, heat the joint area until it reaches the appropriate brazing temperature for welding. The temperature will depend on the type of filler metal you are using, so consult the manufacturer's instructions for guidance. Apply the heat evenly across the joint, taking care not to overheat any one area.
Step 6: Apply the Filler Metal during Welding
Once the joint is at the correct temperature, apply the filler metal to the joint. Touch the end of the filler metal wire or rod to the joint and allow it to melt and flow into the gap. Continue to apply the filler metal until the joint is filled. The welding process requires a steady hand and careful control of the heat to ensure a strong bond.
Step 7: Cool and Clean the Welded Joint
After applying the filler metal, remove the heat source and allow the welded joint to cool naturally. Do not quench the joint in water, as this can cause cracking. Once the joint is cool, remove any excess flux or filler metal using a wire brush or sandpaper.
Step 8: Inspect the Welded Joint
Inspect the brazed joint for any defects, such as porosity, cracks, or incomplete filling. If any defects are found, the joint may need to be reheated and additional filler metal applied. A properly welded joint should be strong, smooth, and free from defects.
How to Braze Brass FAQ
Brazing brass is a technique used to join pieces of brass through the use of a filler metal with a lower melting point than the base metals. The filler metal is heated to its melting point, and then flows into the space between the brass pieces through capillary action. As the filler metal cools and solidifies, it forms a strong joint. Brazing brass requires the use of proper filler metal and flux, as well as careful temperature control.
What equipment is needed to braze brass?
The basic equipment needed includes:
- A brazing torch or furnace to heat the brass to the proper temperature. An oxyacetylene or propane torch is commonly used.
- Brazing rods or wire made of a filler metal with a lower melting point than brass, such as silicon bronze or silver solder.
- Flux, is a borax-based chemical that helps the filler metal flow and prevents oxidation.
- Heat-resistant gloves, eye protection, and other protective equipment.
- A fire extinguisher in case of fire.
What temperature is required to braze brass?
The exact brazing temperature depends on the filler metal used but typically ranges from 1,100 to 2,000 degrees Fahrenheit. The brass pieces must be heated to the melting point of the filler metal so that it can flow freely between the joints. However, the base metal should not reach its melting point, which would weaken the joint. Careful temperature control and monitoring are required.
How should the brass pieces be prepared?
The brass pieces must be thoroughly cleaned to remove any dirt or oxides. The surfaces to be joined should be filed or sanded to expose bare metal. The pieces should be fitted closely together, with a gap of 0.002 inches or less between them. Flux should be applied to prevent oxidation during heating. The brass can then be clamped or secured in place and heated using the torch until the filler metal melts and flows between the joints.
What are the advantages and disadvantages of brazing brass?
Brazing brass provides a strong joint without significantly altering the properties of the base metal. However, the brass pieces must fit closely together, and brazing may not work well on large gaps. The brazed joint may also not withstand high stresses. Brazing also requires significant heat, so it may not be suitable for all brass pieces.
Conclusion
Brazing brass can be an intimidating process for those unfamiliar with the technique, but this guide has provided a thorough, step-by-step walkthrough to demystify brazing for even novice metalworkers. With the right safety equipment, materials, and techniques, brazing brass can produce incredibly strong, precise joints while avoiding the distortion caused by other high-heat methods.
While practicing on scrap pieces is highly recommended when first learning to control the brazing torch and gauge appropriate filler amounts, the basic principles outlined here should enable anyone to achieve quality brazed brass joints. With some patience and care, brazing brass can become an enjoyable and rewarding process that unlocks new design and repair possibilities for metal fabricators of all skill levels.
At Arccaptain, we offer products and resources to help you learn and perfect your brass brazing skills. Our range of filler metals, fluxes, and welding equipment is designed to make your brazing projects easier and more successful. Visit our website to explore our products and find the tools you need to take your brass brazing to the next level.


