Introduction
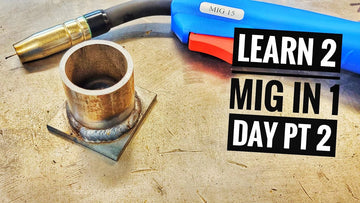
Welcome back to AC Designs Garage, where we're diving into the art of MIG welding. In today's episode, we're progressing to part two of our "Learn MIG Welding in One Day" series, focusing on the intricate process of welding tubing to flat plates. If you missed part one, be sure to check it out in the description below, where we covered the basic machine setup and bead navigation. Today's tutorial comes in response to a subscriber's request, as we tackle the challenges of controlling bead rounds and angles while manipulating the weld.
Machine Setup Recap
Before we dive into the welding techniques, let's quickly review the machine setup. Refer to the seven steps outlined in the previous episode for optimal results. Prepping your metal, tacking your part, adjusting the torch height, choosing your gun motion, and setting up the machine are crucial elements. If you missed these steps, don't worry – you can find them in the video description or on our Amazon affiliate account.
Essential Tools and Materials
To ensure a seamless welding experience, gather the necessary tools: M pliers for precise cut-off lengths, nozzle gel to keep the contact tip clean, a reliable wire brush, a quality helmet for safety, and, of course, the main star – your welding machine. In this tutorial, we are using the Arccaptain MIG200, a versatile tool capable of handling various welding tasks.
Welding Materials
For today's project, we're working with an inch and 3/4 mild steel tubing (120 wall) and a 3/16 by 2-inch flat bar. The machine is set up with argon carbon dioxide (75:25 mix), running 0.030 MIG wire (er70s-6). Feel free to check the video description for links and discounts on the mentioned products.
Welding Techniques: Mastering the Art
Now that we've covered the basics, let's delve deeper into the various welding techniques essential for welding tubing to flat plate. Each method requires its unique approach, so let's explore the nuances and tips shared by the expert.
1. Straight Stringer Technique
Consistent Pace: As you embark on the straight Stringer technique, maintaining a consistent pace is crucial. The goal is to achieve a smooth and even bead. The author emphasizes the importance of a steady hand and the use of both hands to ensure control throughout the process.
Root Focus: Direct your attention to the root of the weld. By focusing on the core of the joint, you ensure proper fusion and a robust connection between the tubing and flat plate.
Rolling Motion: Utilize a rolling motion, rotating the gun slightly, especially around curves. This technique helps maintain a uniform angle and contributes to a more aesthetically pleasing weld.
2. Sawtooth Pattern
Dry Run Preparation: Before diving into the sawtooth pattern, conduct a dry run to acquaint yourself with the up-and-down motion. This preliminary step ensures a smoother execution when you initiate the actual weld.
Peak and Valley Consistency: When executing the sawtooth pattern, aim for even peaks and valleys. Consistency in this motion contributes to the overall visual appeal of the weld. The author suggests paying close attention to maintaining a rhythmic flow during the welding process.
Tacking Starting Point: Tack your starting point securely before proceeding with the sawtooth pattern. This initial anchor point provides stability and sets the foundation for the entire weld.
3. Cursive E or Stacking Dimes
Guideline Marking: Enhance visibility by marking guidelines with soapstone. This additional step ensures that you can clearly follow your planned path during the welding process.
Comfortable Heat Setting: Begin with a heat setting that feels comfortable for you. Practice the motion and gradually adjust the settings as needed. The author stresses the importance of finding the right balance between heat and speed to achieve optimal results.
Consistent Spacing and Overlap: When executing the cursive E or stacking dimes, focus on maintaining consistent spacing and overlap. This meticulous approach contributes to the characteristic stacked-dime effect, showcasing both skill and precision.
General Tips for All Techniques
Body Positioning: Emphasize the importance of body positioning. Ensure that you are comfortable and properly positioned for each technique. The author recommends keeping the elbow on the table for added stability.
Two-Handed Approach: Reiterate the advantage of using both hands during welding. This provides better control over the gun and promotes a smoother welding experience.
Visualization: Encourage welders to visualize the entire welding process. Watching the puddle and focusing on the tip of the wire are critical aspects that contribute to overall weld quality.
Conclusion
Congratulations on delving into these advanced welding techniques! Remember, welding is not just a skill; it's an art that requires dedication and continuous practice. Whether you find comfort in the simplicity of the straight Stringer or enjoy the intricacies of stacking dimes, each technique has its place in your welding journey. Stay tuned for more expert insights, and don't forget to share your progress in the comments below. Happy welding!
