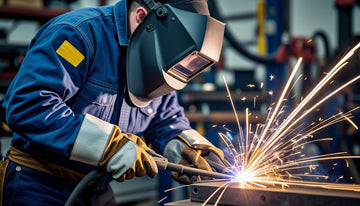
These essential stick welding tips will transform your welding projects from amateur attempts into professional-quality results. Whether you're working on structural steel, pipeline repairs, or general fabrication, mastering the right techniques separates successful welders from those struggling with poor penetration and messy beads.
Stick welding remains one of the most versatile welding processes, but it demands precision and knowledge. Small adjustments in electrode selection, amperage settings, and technique can dramatically improve your weld quality and reduce costly rework.
The following ten proven tips will help you achieve consistent, strong welds that meet professional standards every time.
Ready to upgrade your stick welding setup? Browse our professional-grade stick welding machines designed for consistent performance and reliable results on every project.
Essential Equipment Setup Tips For Professional Results

Getting your stick welding setup dialed in saves a ton of frustration. The right electrode, proper amperage, steady arc length, and good positioning—these are your basics for solid welds.
1: Choose The Right Electrode For Your Project
Your electrode choice matters a lot. Some electrodes just work better with certain metals or in specific conditions.
E6010 electrodes are your go-to for dirty or rusty metal. They dig in deep and work in any position. Great for outdoor stuff or when cleaning the base metal isn't an option.
E7018 electrodes make the cleanest, strongest welds—but only if you keep them dry in an electrode oven. They're happiest on DC positive polarity.
Store electrodes right. Keep them sealed until you need them. If you open a pack of low-hydrogen rods like 7018, stash them in an oven at 250°F.
Match electrode diameter to the metal thickness:
- 3/32 inch: Thin stuff up to 1/8 inch
- 1/8 inch: 1/8 to 1/4 inch
- 5/32 inch: Over 1/4 inch
2: Set Proper Amperage Settings
Set your amperage right for decent penetration without burning holes. Too low, and you get weak, cold welds. Too high, and you’ll make a mess—holes, spatter, you name it.
Here's a quick formula: multiply the electrode diameter in thousandths by 40. So, a 1/8 inch (125 thousandths) rod? Start around 125 amps.
Check your machine's power output. Make sure your polarity matches the electrode’s needs—most like DC positive.
Adjust as you go:
- Turn up the amps if your rod keeps sticking or the weld looks shallow
- Back it down if you’re blowing through or getting a ton of spatter
Thicker metal? Bump up the amps for better penetration.
3: Maintain Optimal Arc Length
Arc length is where a lot of folks trip up. Keep the electrode tip about one diameter from the metal. For 1/8 inch rods, that's about 1/8 inch away.
That sweet spot gives you a stable arc, good penetration, and less spatter.
Too long and you’ll get:
- Spatter everywhere
- Ugly, wide beads
- Weak penetration
- Arc that jumps around
Too short and your rod will stick constantly. Not fun.
As the rod gets shorter, move your hand closer to keep the arc length steady. Watch the puddle size—it’ll tell you if you’re in the zone.
4: Perfect Your Electrode Angle
Angle matters. It controls where the heat goes, how deep you weld, and what your bead looks like. Usually, a 10-20 degree travel angle works well.
Work angle changes with the joint:
- Flat: Hold it straight up and down
- Horizontal: Tip it a bit upward
- Vertical: Use a gentle weave side to side
Always drag the rod—don’t push it. Dragging helps you see the puddle, and the weld turns out better.
Make sure your welding helmet gives you a clear view. If you can’t see, your angles will wander and your welds will suffer.
Steady hands help. Rest your arms or hands on something solid if you can—it really cuts down on wobbles and fatigue.
Skip the gas bottles and simplify your welding process. Check out our versatile gasless welders perfect for outdoor projects and portable applications.
Advanced Technique Tips That Separate Pros From Beginners

Pros nail four things: smooth arc starts and restarts, steady travel speed, slag-free welds, and reliable penetration. These take practice, but they're worth it.
5: Master The Strike And Restart Technique
The way you start your arc says a lot. Pros use a quick tap-and-lift to get going, not a scratch like lighting a match.
Strike Method:
- Touch the rod to the metal gently
- Pull back 3mm as soon as the arc catches
- Steady your hand and get welding
When restarting, aim just ahead of your last weld pool. Striking right on the old bead can cause cold lap—nobody wants that.
Try some dry runs before striking an arc. It helps you avoid awkward hand positions that lead to botched restarts.
Common Mistakes:
- Scratching the rod like a match
- Pausing after the arc fires up
- Restarting on cold, solid metal
6: Control Your Travel Speed For Consistent Welds
Your travel speed can make or break a weld. Too fast? The bead goes skinny and doesn’t fuse. Too slow? You get a fat, messy puddle.
How to tell:
- Just right: Puddle stays the same size, ripples look smooth
- Too fast: Bead is thin and pointy, not enough fusion
- Too slow: Wide, lumpy bead, risk of burning through
Try keeping a rhythm—count in your head or sync with your breathing. Watch that weld pool like a hawk. It should trail right behind the rod, not lagging or racing ahead.
7: Eliminate Slag Inclusion Problems
Slag inside your welds is bad news. It causes weak spots and can make your weld fail. Keep your rod angle right and clean between passes.
Key moves:
- Always drag the rod (except for vertical-up)
- Keep a 10-15 degree drag angle
- Don’t push the puddle
- Clean off slag before the next pass
Angle matters for slag flow. Too steep, and slag gets trapped. Too shallow, and you won’t get good penetration.
For multi-pass welds:
- Run the root pass with a tight arc
- Chip and brush off the slag
- Check for inclusions—don’t just keep going
- Grind out any defects instead of welding over them
Honestly, grinding and rewelding now is way easier than fixing problems later.
8: Achieve Proper Penetration Every Time
Strong welds need solid penetration. Get your amps, arc length, and angles working together.
What to watch:
- Arc length: Keep the rod about 3mm from the work
- Current: Start mid-range, tweak by 5-10 amps as needed
- Angle: 90 degrees to the joint for max penetration
Good penetration leaves a slight dip behind the puddle. The arc should sound crisp, not sputtery.
If you’re struggling:
- Not enough penetration? Turn up the amps, shorten the arc, or slow down
- Too much? Back off the amps or speed up
- All over the place? Focus on arc length first
Test on scrap with the same thickness as your real project. Break tests show you exactly how deep your welds go.
Professional-Grade Tips For Flawless Finishing
Welding isn’t just about holding things together. You want to avoid porosity and cracking, and your welds should look good too.
9: Prevent Porosity And Cracking Issues
Porosity looks like tiny holes or bubbles—usually from trapped gas. Clean your metal well with a wire brush or grinder before you start.
Get rid of oil, paint, dirt, and rust. Even a little contamination can mess up your weld.
Keep your arc length tight so gas doesn’t sneak into the puddle. Stick to the rod diameter for distance. Too long, and you risk air mixing in.
Don’t weld in wind if you can help it. Wind blows away the protective gas from your rod’s coating. If you have to work outside, set up a screen or find some shelter.
Travel speed matters. Too fast, and you might not fuse properly or get cracks. Too slow, and you’ll overheat things—also a crack risk.
Amperage matters here too. Too low, and you get cold laps. Too high, and you risk burning through or stressing the metal.
10: Create Clean, Professional Weld Appearances
The right electrode makes a difference. 7018 rods give the smoothest, cleanest beads with little spatter. They cost more, but honestly, the results speak for themselves.
Keep your rod angle and speed steady. Any changes show up as uneven beads or weird ripples.
Knock off spatter right away while it’s still hot. Use pliers or a chipping hammer. If it cools, it’s a pain to remove.
Clean after every pass. Chip off the slag, then brush off the rest.
Watch for undercut—those grooves at the bead edge. If you see them, lower your amps or slow down. Undercut weakens the weld and looks sloppy.
Grind down any high spots or rough patches. A small grinder with a flap disk works great for blending things in.
Complete your welding toolkit with the right accessories. Explore our comprehensive collection of professional welding tools to enhance your technique and improve weld quality.
Conclusion: Stick Welding Tips
Mastering these stick welding tips takes practice, but the results speak for themselves. Consistent application of proper electrode selection, amperage settings, and technique will elevate your welding quality and reduce material waste. Professional welders rely on these fundamentals every day.
Remember that each welding project presents unique challenges. Start with these proven techniques, then adapt them to your specific applications. Quality welds aren't just about appearance—they're about structural integrity and long-term performance.
Ready to tackle another essential welding skill? Learn how proper wire selection impacts your projects by checking out our comprehensive wire gauge calculator guide.
Frequently Asked Questions
Stick welding brings up a lot of the same questions—about technique, angles, which way to move. Here are some quick answers to help you get steadier welds.
What is the trick to stick welding?
Keep your arc length at one electrode diameter from the metal. Use the scratch method—drag the tip like striking a match until the arc starts. Store rods clean and dry to prevent poor welds and erratic arcs.
What are the 5 basic elements of stick welding techniques?
The five basics are electrode selection, amperage settings, arc length, travel angle, and travel speed. Choose the right electrode size and set amperage to match your metal thickness. Maintain steady arc length and monitor puddle size for consistent results.
What angle should you stick weld at?
Hold the electrode at 10-20 degrees travel angle, with 15 degrees ideal for most jobs. This angle directs heat into the joint while keeping the puddle visible. Adjust closer to 0 degrees for more penetration or up to 20 degrees for thinner materials.
Should I push or pull when stick welding?
Always pull or drag the electrode—never push through the joint. Pulling prevents slag inclusions and gives you clear puddle visibility. Drag toward yourself while weaving slightly for better penetration and stronger welds.