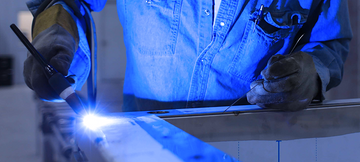
TIG200 Quick Start Guide: Setting Up and Testing the ArcCaptain DC TIG Welder TIG200
May 18, 2023

The video demonstrates the unboxing and setup of the ArcCaptain DC TIG200 welder, including TIG and stick welding modes. It provides a detailed overview of the control panel, torch assembly, gas connection, and electrode setup. The instructor demonstrates welding techniques and provides tips for achieving good welds. The video also showcases the accompanying backpack.
Title: Setting Up and Testing the ArcCaptain DC TIG 200: A Quick Start Guide
Introduction
In this video, we will explore the process of unboxing and setting up the ArcCaptain DC TIG 200 welder. The TIG 200 is a compact and portable unit that offers both TIG and Stick welding capabilities. We will go through the components included with the machine, the control panel features, assembly of the TIG torch, setting up for TIG welding and stick welding, as well as some tips for achieving quality welds. Let's dive in.
Unboxing and Components:
The Arc Captain DC TIG 200 comes with an adapter plug for 120V to 220V conversion, a strap for easy portability, a wp17 torch, and various attachments. Additional kits are available for customization, including different nozzles. It also includes a stick welding electrode holder, a gas hose for Argon, a ground clamp, and a user manual.
Control Panel Overview
The control panel of the welder features a main adjustment knob for controlling the amperage. Depending on the power source, either 120V or 220V, different amperage options are available for Stick and TIG modes. Other buttons on the control panel allow for selecting welding modes (Stick, TIG 2T, TIG 4T) and setting preferences for TIG mode, such as downslope and post gas.
Setting Up for TIG Welding
To set up the machine for TIG welding, the ground clamp is connected to the positive side, and the wire from the torch switch is connected and screwed in. The shielding gas hose is attached, ensuring a tight seal, and the main connection for the TIG torch is plugged into the negative terminal. With these connections in place, the machine is ready for TIG welding.
Assembly of the TIG Torch
The TIG torch consists of several parts that need to be assembled correctly. These include the torch body, end cap, collet body, nozzle, and tungsten. The collet body is screwed in, the collet is inserted from the back, and the tungsten is pushed through the center. The nozzle is then fully seated, and the end cap is tightened to secure the tungsten in place. The length of the tungsten stick out should generally be no wider than the inside diameter of the nozzle.
TIG Welding Techniques
Before starting the welding process, it is recommended to practice and ensure the torch movement is comfortable. The torch should be angled in the direction of travel, providing a good distribution of heat. A filler rod is used at a narrow angle, and once the keyhole on the base material is formed, it can be filled with the rod. Maintaining a stable arc and a proper tungsten tip is essential for accurate and clean welds.
Setting Up for Stick Welding
For stick welding, the ground clamp and electrode holder are connected accordingly. The orientation of these connections depends on the welding requirements. For example, when welding 6013 on steel, DC electrode positive is used. Once connected, the electrode is inserted into the holder, and the stick is ready for use.
Stick Welding Technique
When stick welding, it is important to maintain a slightly negative angle to allow the slag to float to the top and avoid it getting stuck in the weld pool. The electrode is struck to initiate the arc, and the welding is performed by moving in the desired direction. As the stick is a consumable, it will get shorter with usage, requiring continuous feeding into the weld as the welding progresses.
Conclusion
In summary, the video serves as a quick start guide for setting up and using the ArcCaptain DC TIG 200 welder. It covers unboxing, component overview, control panel features, TIG torch assembly, setup for TIG and stick welding, and provides tips for achieving quality welds.
