


Introduction:
Welcome back to AC Designs Garage! In this intensive one-day series on mastering MIG welding, we're diving into the world of welding square tubing. Throughout this tutorial, we'll explore various techniques, uncover useful tips, and provide a step-by-step guide to welding square tubing. So, let's get started!
Understanding the Material:
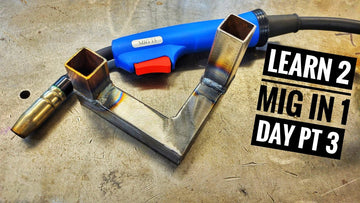
Before we delve into the welding process, let's quickly go over the material we'll be working with. Our focus is on a 1 by 1-inch, 11/16-inch thick mild steel square tube. Despite some surface rust on the scrap material, we'll demonstrate how to create different joints, such as T joints and miter joints, and address potential challenges.
Essential Steps and Equipment:
To ensure successful welding, let's review the seven essential steps we follow in this series:
1.Prep: Properly prepare the materials, ensuring a tight fit for optimal penetration.
2.Tack: Secure the pieces with tack welds at strategic points.
3.Angle: Maintain a consistent angle during welding.
4.Gun Motion: Choose between pushing, pulling, or dragging the gun based on your comfort.
5.Arc and Spark Control: Master the art of controlling the arc and sparks.
6.Nozzle Gel: Use nozzle gel to prevent spatter accumulation on the MIG nozzle.
7.Safety Gear: Utilize essential safety gear, including an auto-darkening shield, gloves, and welding helmet.
Equipment Spotlight: Arccaptain MIG200
We've been using the Arccaptain MIG200 for about 6-8 months, and it has proven to be a reliable machine. This versatile welder handles TIG, stick, and MIG welding with ease. Check out the description for a discount code and links to purchase.
Welding Techniques:
1.Joint Preparation: Achieve a snug fit by cleaning and chamfering the edges, crucial for successful welding.
2.Tack Welding: Tack weld strategically to maintain alignment without causing distortion.
3.Welding Variations: Explore different techniques for various joints – including uphill, downhill, and trigger welding for specific scenarios.
4.Inside Corner Considerations: Be mindful of inside corners, requiring more heat and longer welding times to ensure proper penetration without creating gaps.
Finishing Touches:
After completing the welding process, we demonstrated two finishing options – trigger welding for certain joints and straight stringers for others. Both methods are suitable for the 16-gauge square tubing used in this tutorial.
Conclusion:
Welding square tubing may present its challenges, but with practice and dedication, you can master the techniques. Remember, the strength of the weld is paramount, and aesthetics improve with experience. Stay tuned for more welding tutorials, and feel free to drop any questions or suggestions in the comments below. Happy welding!


