Introduction
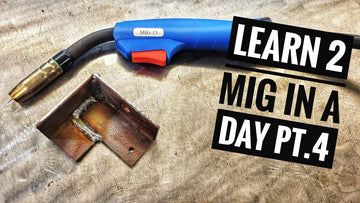
Welcome back to AC Designs Garage! In the final episode of our series on mastering MIG welding in one day, we're diving into the versatile world of angle iron welding. Whether you're adding braces to your car trailer, constructing a welding cart, or fashioning a welding table, mastering this essential skill is a game-changer. Today, we're working with inch and a half by inch and an eighth thick angle iron, making it accessible for various projects.
Tip: This is the fourth episode of our video series. If you would like to learn more about MIG welding beginner techniques, please click the link below.
Learn to MIG Welding Run A Bead
Learn to MIG weld thin square tubing
Preparing the Material
Our welding material today is a piece of slightly worn, rusted angle iron. After a quick grind to clean off the rust, this recycled piece is ready for action. The dimensions we're working with are carefully measured at 3-inch intervals, creating sets of coupons for our welding practice.
Choosing the Right Technique
Initially planning to use a miter technique, we've opted for a flush fit approach instead. This modification allows for broader accessibility, considering that not everyone has a miter tool. By demonstrating a flush fit with a cut-off wheel, we're ensuring that this technique is accessible to all DIY enthusiasts.
Executing the Flush Fit
To achieve a seamless and professional look, we're focusing on the flush fit method. This involves notching and cutting the angle iron to create a joint that sits perfectly flush. This technique is particularly beneficial for projects like battery trays, eliminating any raised areas and enhancing the overall aesthetics.
Welding Techniques
1.Lap Joint Welding Technique
The lap joint is a fundamental welding method that involves overlapping two pieces of metal to create a strong and reliable connection. In our demonstration, we've shown how to prepare and execute a lap joint with precision. This technique is versatile, commonly used for extending pieces or joining materials where strength is paramount.
Pro Tip: Grind down the overlapping edges to ensure a smooth and seamless finish. This not only enhances the appearance of the weld but also contributes to its overall strength.
2.Flush Fit Welding Technique
The flush fit technique takes welding aesthetics to the next level. By notching and cutting the metal pieces to fit perfectly together, you achieve a weld that sits flush, creating a professional and polished look. We showcased the step-by-step process, emphasizing how this technique is ideal for applications like battery trays, where a seamless surface is essential.
Pro Tip: Pay attention to the alignment and snug fit of the notched pieces. This ensures a tight bond and enhances the overall structural integrity of your weld.
3.Butt Welding Technique
The traditional butt weld is a go-to technique when you need to join two pieces of metal end-to-end. We demonstrated how to execute a solid butt weld, emphasizing the importance of proper penetration for strength. This technique is valuable when you encounter situations requiring the extension of metal pieces or creating clean connections.
Pro Tip: For optimal results, ensure that the two pieces are properly aligned, and pay attention to the welding settings to achieve consistent penetration along the entire length of the joint.
4.Arc Shots and Welding Settings
Understanding the intricacies of your welding machine settings is paramount. In our demonstration, we set our welder at 195 and 6.5 meters per minute, showcasing how these settings impact the welding process. The arc shots provided a close-up view of the welding technique, focusing on a downhill approach for a clean and uniform weld.
Pro Tip: Experiment with different settings on scrap pieces to find the optimal combination for your specific material and project requirements.
Conclusion
As we wrap up this welding series, we've covered essential techniques for mastering MIG welding. From flush fit joints to practical tips on filling holes and achieving clean welds, these skills will elevate your welding game. Remember, practice makes perfect, so grab your safety gear, put on your ear muffs, and dive into the world of MIG welding. For the full series, tune in to @AC Design Garage.


